Safest method for cleaning a really dirty engine bay – brush, towels and some elbow grease, not water hose
Cleaning your car engine bay can be an intimidating thought, especially if you’re planning to do it for the first time. There are many methods to go about it, such as wiping it down with a few microfibre cloths, steam cleaning, and yes, hosing it down with water.
As we’ve reported recently, taking a stream of running water over your engine bay is risky and can end up damaging sensitive components when not done right. The risks are greatly multiplied when you use a pressure washer – high-pressure water streams can easily find their way past gasket seals and plastic covers that protect things like the ECU, fuse box, ignition wires, and sensors.
If you’re not comfortable with the idea of doing it yourself, we recommend sending your car to an authorised service centre for proper cleaning. If the budget allows, consider a professional car detailer. More often than not, these guys would have the right tools, products and knowledge to safely do the deed.
You might ask, will my car benefit from a squeaky clean engine bay? Yes it will. Aside from keeping it looking new, regular cleaning will help you easily identify the source of leaks, if any. The engine bay is also a grease and grime magnet, which may accelerate the rate of wear and tear of rubber hoses and plastic parts, so removing those gunk could save on repairs in the long run.
It’s a lot like washing your own car. When you do it yourself, you’ll discover new dings or scratches that were not there before. In the case of your engine bay, you may find broken clips, disconnected wires/cable, or even cracked plastic covers, especially with older cars that are serviced by third party mechanics.
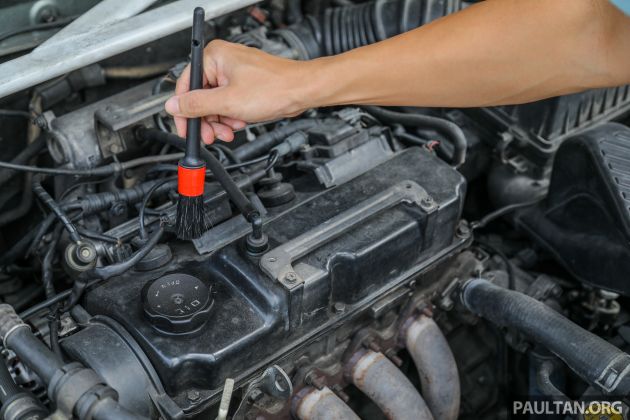
In all honesty, cleaning the engine bay is hardly a difficult thing to do. Our favourite method is also the easiest, using a combination of cloths, a soft bristle brush, and some degreaser. If chemicals are involved, consider wearing nitrile gloves (which I conveniently forgot to bring, silly me) – your skin will thank you. Now, let’s get on to the cleaning phase. Remember to do this only when the engine is cool to the touch!


The first thing we recommend doing is inspect the surfaces for debris. Things like twigs, leaves or even loose pebbles should be removed by hand. For finer things like loose dust or sand, you can choose to vacuum those out as well. Then, begin dusting any surface that you can physically reach, and do so gently.
Once you’re satisfied, take your preferred engine degreaser product and spritz some onto the brush. This moistens and saturates the bristles, making it easier for you to spread the product around. This is also a great way to get some of the cleaning fluid into tighter crevices.
We also prefer working on individual panels (one at a time). For example, spray an adequate amount of degreaser onto a single panel, work the product in with a brush, then immediately wipe off with a towel. This prevents the dirty solution from drying and re-adhering to the surfaces you have just worked on. Repeat this process until the desired result is achieved, then let it air-dry.


You may also use dish soap instead of a degreaser, but we caution against this unless you plan to apply some sort of protectant afterwards. Dish soap, while very effective in removing grease and dirt, is also quite dehydrating for rubber and plastic components. But if that’s all you have at your disposal, well, the first time won’t hurt, we guess.
This agitate, wipe and dry process may seem infinitely more labourious than using a water jet or pressurised air, but it’s also the least risky. For some, the process might even be therapeutic! You most certainly have the luxury of time to do this now, don’t you?
Just doing the above will net you a much cleaner, newer looking car. The once chalky plastic surfaces of this 2003 Proton Waja now appear brand new again, and you can tell how much of a difference it makes just by looking at the overall before/after photo below.
One thing of note is that this method can be a bit time consuming, but the results scale with the amount of time spent cleaning. We only took the better part of 20 minutes with this 18-year-old car, and already the results speak for themselves. We also used a trim restorer to rejuvenate the ageing tubes and plastics to make sure they stay clean and protected for longer.
Of course, with a little bit more time, we could have made several extra passes and cleaned the lower, deeper sections of the engine bay. But this was meant to be a quick DIY guide, showing you just how much can be done with cheap products that don’t break the bank, and most importantly won’t cause any damage whatsoever. Just remember not to manhandle things as you go.
If you’re planning to go the extra mile, you can also consider polishing some of the metal components for some added gleam. So, if you have the will and the time, the process can be pretty exhaustive. But if you’re like us, you’ll probably end up enjoying the whole thing anyway.


The post Safest method for cleaning a really dirty engine bay – brush, towels and some elbow grease, not water hose appeared first on Paul Tan's Automotive News.
from Paul Tan's Automotive News
Read The Rest:paultan...


Post a Comment